Requesting a grid certificate using the Terena eScience Portal
The Terena eScience Portal is an effort to provide users with a tool for requesting grid-certificates using the credentials from their home-institution or university.
To request a Terena eScience Certificate go to the following URL: https://tcs-escience.sunet.se
The general procedure:
- 1. Request a certificate from the portal. video
- 2. Export/backup certificate installed in browser. video
- 3. Convert exported certificate to a X509 certificate. video
- 4. Verify installed certificate (optional). video
It's vital that you DON'T use https://tcs-personal.sunet.se. This is a very similar portal, but you will not get a certificate that is usable in the grid community like DEISA, Swegrid and Swestore.
The detailed procedure is as follows:
1. Click "Login"
2. If requested, click on Sweden on the map.
3. Choose your identity provider in the drop down box. This is usually your home university.
4. Login using your credentials from your identity provider (your university).
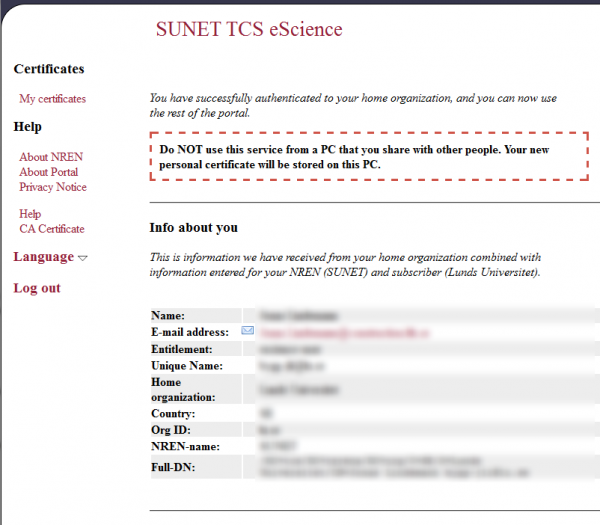
You should now arrive to a "home" page that shown below:
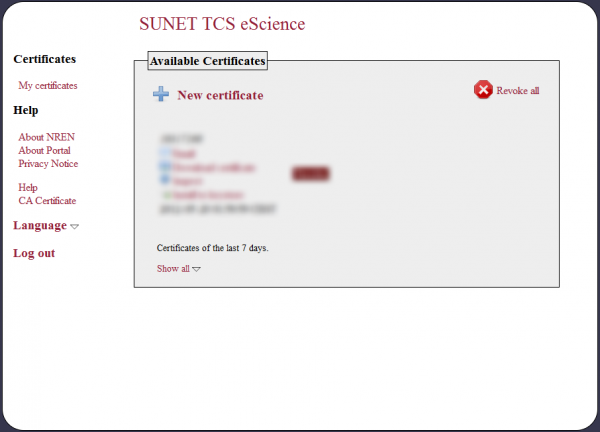
5. Click on the "My certificates" link in the top left side of the page. You should then arrive to a page from which you will create and manage your certificates.
6. To create a new certificate, click on the "New certificate" link and follow the instructions. When the process is completed your certificate will be listed on the same page.
7. Install the signed certificate in your browser by clicking on the "Install in keystore" link. This will install the certificate in the key-store of your browser.
The resulting certificate Subject or DN should at this point start with "/DC=org/DC=terena/DC=tcs/". If it starts with "/C=SE/O=YOUR SITE/" then you have the wrong type of certificate. Please make sure you use the right portal above. If the problem persists, please contact support@swegrid.se before proceeding
Exporting Terena certificate for use with Grid tools
To use the Terena certificates with the ARC grid client they have to be exported from the browser and converted into a suitable format. To export and convert a certificate installed the following procedure can be used:
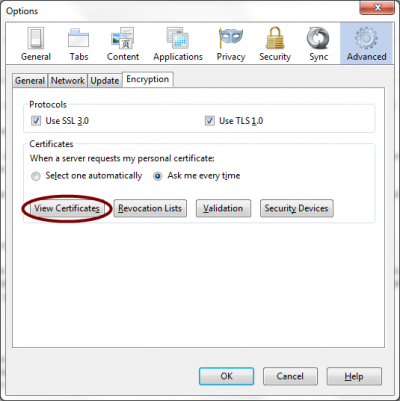
1. Export the installed certificate from the browser in the PKCS12 format. In Firefox this is accomplished from the Options/Advanced/Encryption Dialog, shown below:
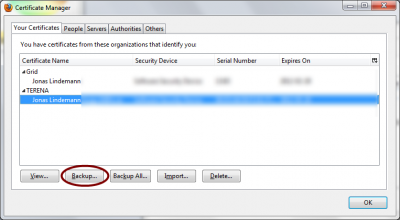
To show all installed certificate click on the "View Certificates" buttton. This will shown the following dialog:
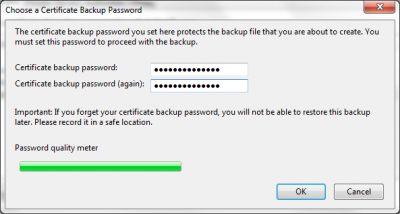
To backup your newly created certificate select the Terena certificate and click on the "Backup" button in the previous dialog. This brings up a dialog for selecting a filename and location for the certificate. Save your certificate in a good location. The file with be given the extension .p12 indicating that it is a PKCS12 certificate. When the location has been selected another dialog is shown asking for a export password. This password will protect the certificate and private key. As show in the next figure:
Use the password quality meter to choose a strong password for the exported certificate and private key.
2. Converting the PKCS12 certificate to a format suitable for use with grid clients (PEM)
Create a directory, .globus, in your home directory.
Linux / Unix:
$ cd ~
$ mkdir .globus
$ cd .globus
In windows
C:\...\>cd C:\Users\<username>
C:\...\>mkdir .globus
C:\...\>cd .globus
Using the "openssl" command we now convert the exported certifcate to the correct format. Windows users: OpenSSL for Windows is available here.
The first step is to convert the private key. The openssl command will first ask for the password chosen when the certificate was exported ("Enter Import Password:"). In the next step the pass phrase for the exported private key is chosen ("Enter PEM pass phrase:"). Please choose a strong passphrase.
openssl pkcs12 -nocerts -in usercert.p12 -out userkey.pem
Enter Import Password:
MAC verified OK
Enter PEM pass phrase:
Verifying - Enter PEM pass phrase:
In the next step the certificate is converted. In the same way as with the private key we have to specify the export password again ("Enter Import Password:").
openssl pkcs12 -clcerts -nokeys -in usercert.p12 -out usercert.pem
Enter Import Password:
MAC verified OK
Before we can use the private key with or client tools the permissions on the private key file (userkey.pem) has to changed to a more restrictive setting (Linux/Unix):
chmod 400 userkey.pem
